This was the same plate again, this time coated with two layers of Johnson’s floor polish, then engraved with an engraving needle into the white areas of the plate that had been stopped out first time, as well as lines crossing both etched and sopped areas.. The plate was etched for 15 minutes. The engraving came out ok, but now I don’t seem to be getting a good ink layer, maybe to do with inks or wetness of paper. But, anyway, established that the engraving using a needle gives lovely sharp lines, both in the masked and the etched parts of the plate.
Month: July 2015
Practice 3: Ferric chloride day 3: soft ground
ResearchThis was an experiment with soft ground. I wanted to know how to achieve soft drawn lines, rather than hard0-bitten ones, and it seemed that a layer of soft ground and pencil could work.
This was now a cleaned plate, with all aquatint removed in Mystrol. A layer of an oil-based soft ground was rolled on with a soft roller. I was careful to try to make this a thin layer, but hadn’t used this before, so was unsure about how long it should sit before going into the ferric chloride. The (Lascaux) soft ground I used at Capileira would harden after a while, because it was not oil based. I couldn’t get hold of that one. I used a piece of soft paper- tissue, and drew through it using:
charcoal crayon
Hartmuth progresson 4B
Pencil 6B
Litho crayon
As can be seen, not many of the marks came out in the end. It could be that my soft ground was too thick after all. Or that the blacks were never going to show against the black anyway.The litho was probably too soft, but the harder pencils worked, and the line quality is nice. It could be that this needs a longer etch. I gave it 20 minutes.
Practice 2: Ferric Chloride Day 2
ResearchSo, I printed that first plate. It was a bit blotchy. A total of 38 minutes was too much, but it was clear that the 5 minutes and thereabout etches got a nice shade of grey. I hadn’t been very systematic but it was a ball park figure. The stop-out pens worked well, gave clean lines. The airbrush sprayed on stop-out gave a lovely soft effect. The wax crayon was textured slightly. The litho pencil was a bit faint. So…
Made a plan for a test plate, wrote it down, had breakfast to think it over, trying not to make a stupid mistake.
Test Plate
Opened a new copper plate, and filed the edges. Took the Mylar off one side and spent ages trying to get it off the other side before deciding there wasn’t any. De-greased it in soya sauce. Sprayed it with airbrushed aquatint, but didn’t get a uniform layer. This bit is hard. Left it to dry.
Cut a backing sheet of sticky backed plastic, and 17 strips of one cm each. Planned to remove one strip each minute, so getting from 0- 18 minutes in intervals of one minute.
I started, and was surprised at how deeply bitten the plate was even after one minute, so decided to half the intervals. So ended up with 0- 9. 5 minutes.
Printed it, and observed that the short times at the start were quite distinct- 30 seconds was quite different to one minute, and the stages up to about 3 minutes were clear to see. After that there was no clear boundary, and the colour just got gradually darker, though not absolutely black. Two or three possible reasons for that:
1. My ink was very thick- I added some aqua wash oil and it got blacker.
2. The aquatint layer wasn’t uniform- where it was thicker, the black was more dense.
3. Perhaps the immersion was too short this time, but I feel it shouldn’t be much longer.
Anyway, established that the intervals are more critical at the early stages.
Inked it again with Charbonnel inks and wash oil to see if the blacks would get more black. They did. It was looking like my ferric was strong, as I was getting blacks quite fast. The baumeter seemed to be telling me nothing.
Made the following list of key times:
0
30 seconds
1 minute
2 minutes
3 minutes
6 minutes
10 minutes
More?
Also noted I should file the plate away from the front, as there was a decidedly hard edge.
Should have changed my intervals after about 6 minutes.
Should have stopped and had a coffee and thought it through….
Practice: Copper plate etching 1: Ferric chloride
ResearchNow equipped with an etching press and gear for copper plate etching. Very little time though. Leaving in a few days.
A quick update of today’s efforts;
Materials: Ferric Chloride, in tubs, 3 kg and a large vertical tank, and a Baumeter:
I followed the instructions to mix 1 part FC with 4 parts water, and ended up with something that measured only 20 Baume, instead of the desired 40-45. Then I should have sat down and though things through in terms of worst case scenario, instead of what I did which was to adopt the modify and let’s see approach. With hindsight, I should have:
a. Measured the Baume by taking a sample into a narrow plastic container that was capable of floating the baumeter, and so had an idea that it wasn’t working as per the instructions.
b. Having discovered it wasn’t working, should have somehow extracted some of the liquid from the tank – difficult given the shape- and mixed more Ferric chloride into the solution, instead of diluting more, albeit in a very reduced amount of water.
c. Considered that Inductive reasoning wouldn’t necessarily work, i.e. adding another 1 kg brought to from 20 Baume to 30 Baume, therefore adding another 1 Kg will bring it up to 40 plus, especially if I use less water this time.
d. Poured the dilute stuff into a container and started again.
Anyway what’s done is done, and all my FC is diluted, and I’ll now just have to experiment to see how it works on copper. When I get back to HK, I’m definitely trying to source ready mixed.
The trouble was there were so many dire warnings about mixing FC and water that I was completely obsessed with the hazards, and also was completely ignorant about the stuff and didn’t know what to expect. I now see that my stuff was already a bit damp, i.e. hydrated, and therefore less explosive. But that also means that 1 kg of damp stuff was considerably less than a KG of powder/ crystals, and presumably the “recipe” I had was for that. Wish I’d done some Chem.
On the upside, I am now more acquainted with FC, and will know better how to deal with it next time. $$$. Hassle of sourcing it. AArgh.
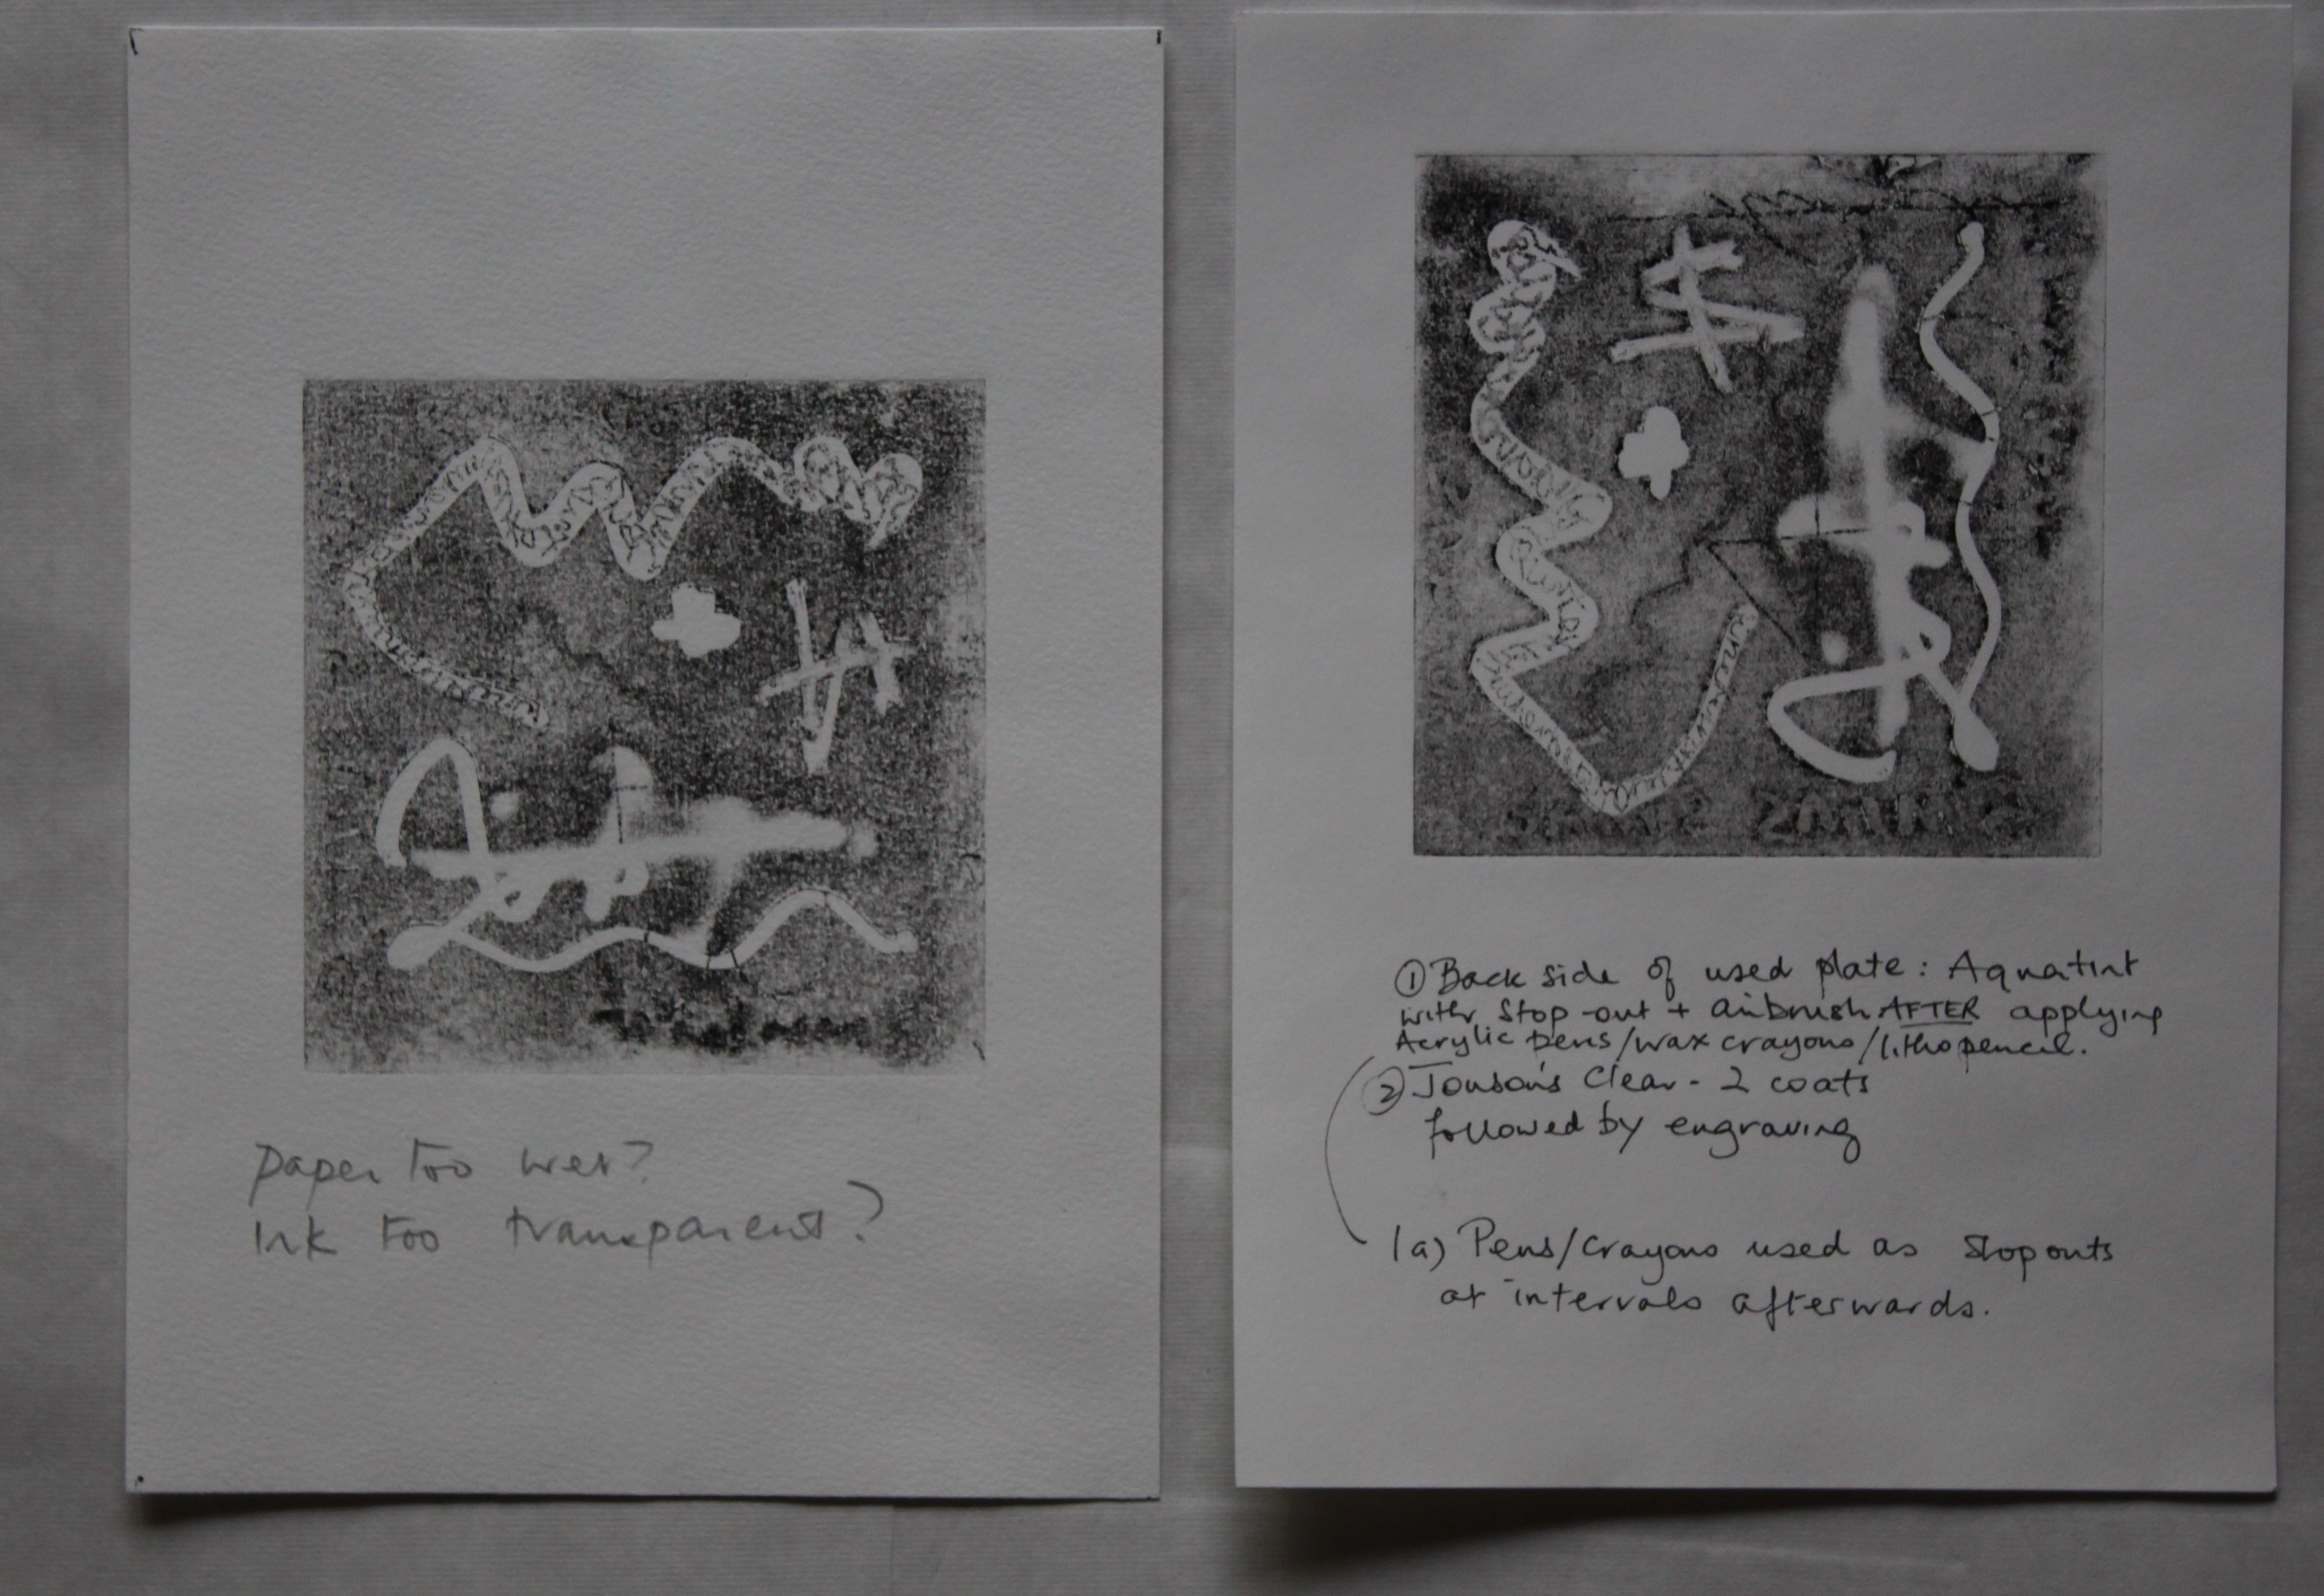
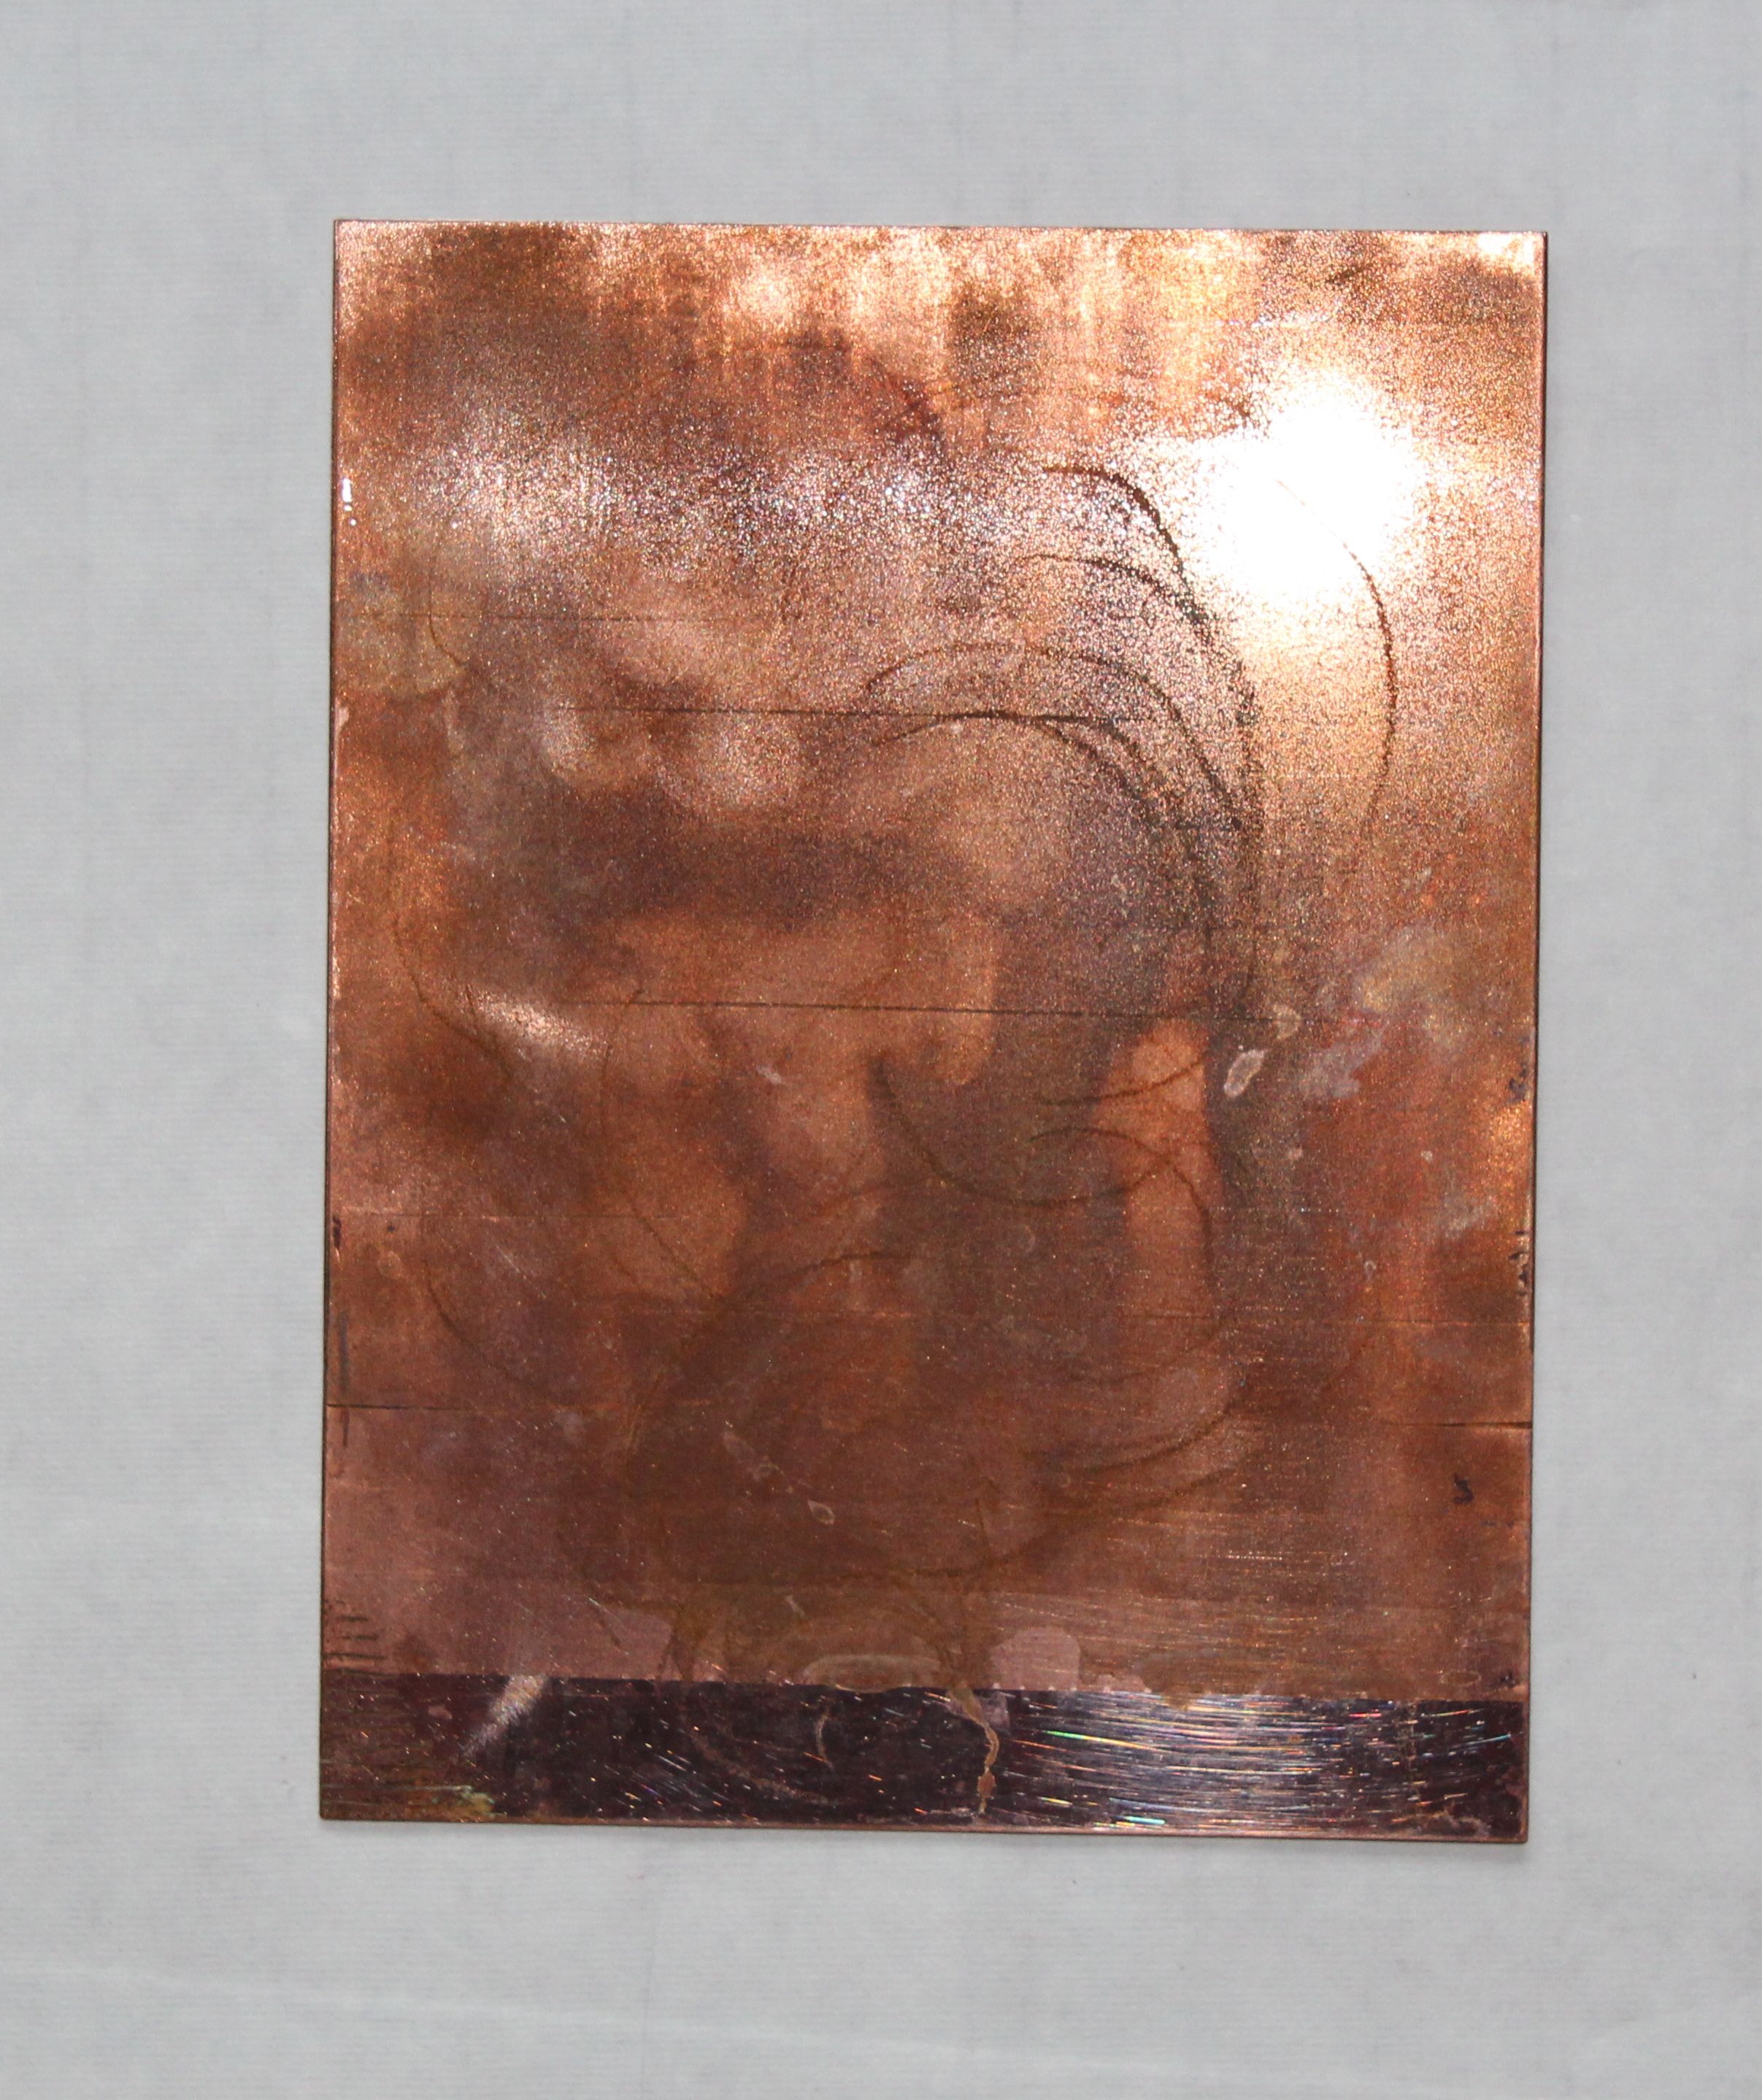
Experiment with copper plate. This is the back of a small one that was my experimental plate in Capileira.
Just to try:
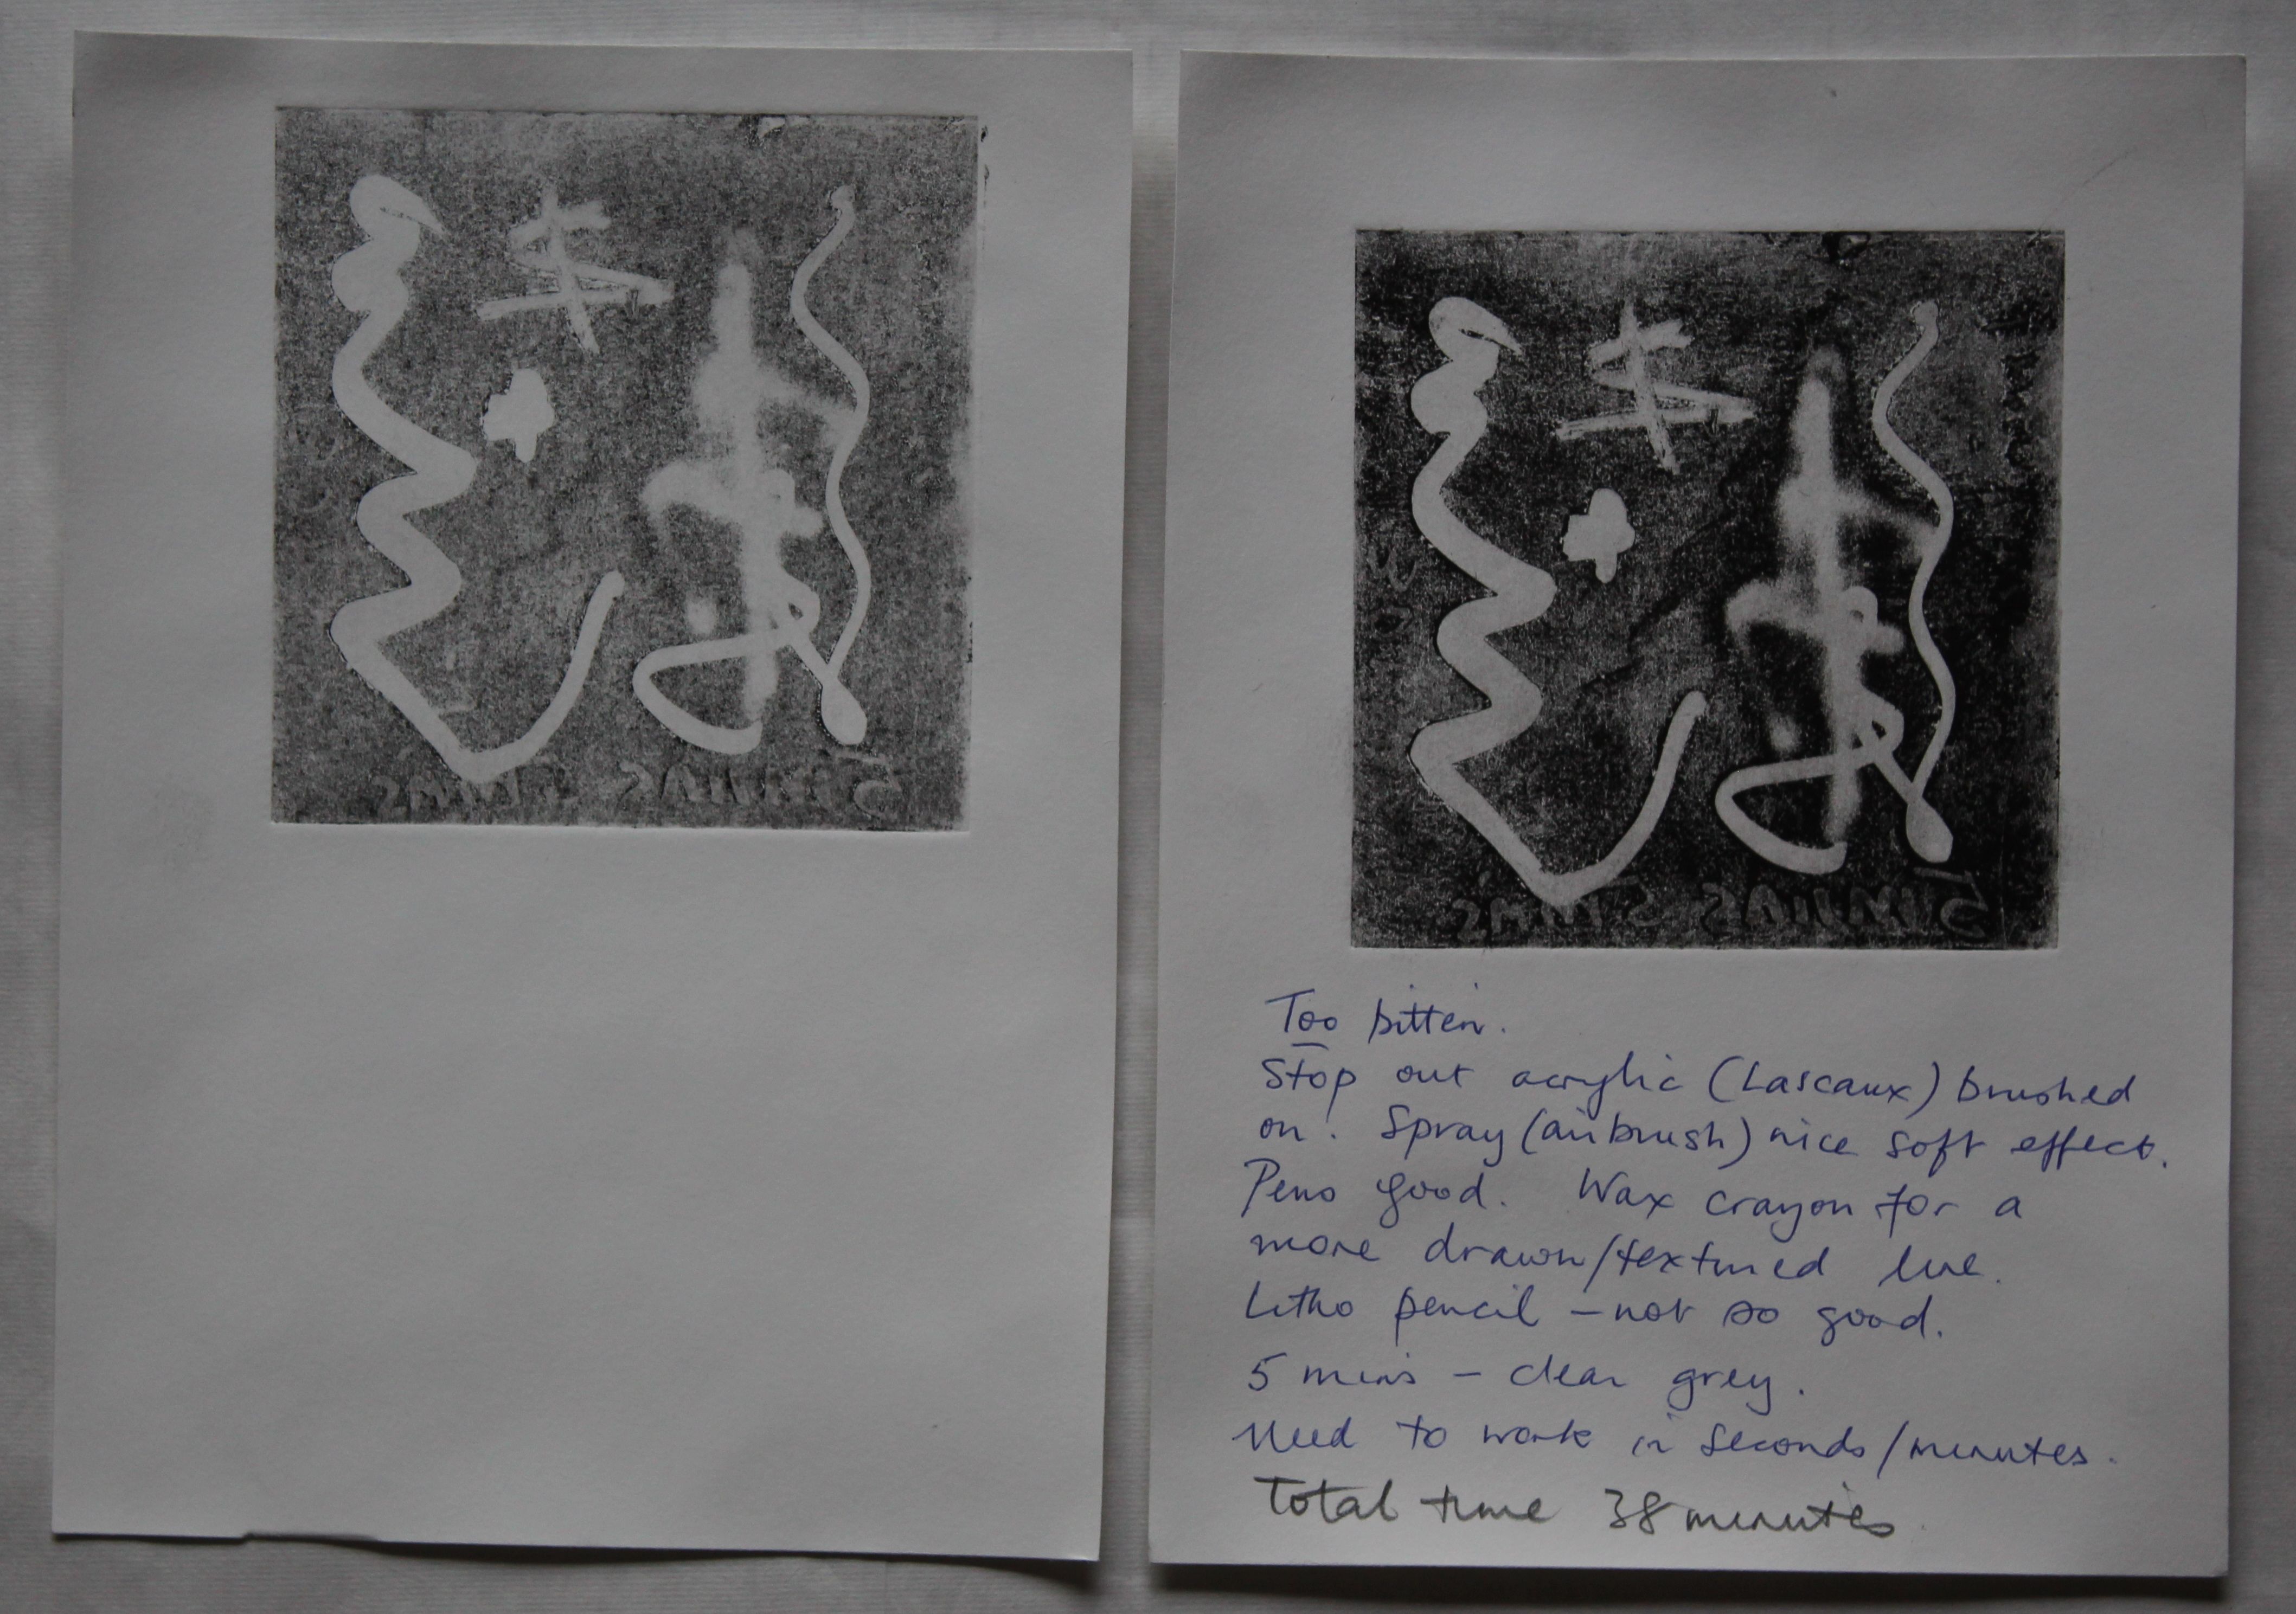
1. Used some different materials to stop out the etching: spray stop out brushed on (Lascaux)
2. Acrylic marker pens.
3. Litho pencils
4. Wax crayon.
These would all be whit-ish s they are stopping out prior to the aquatint layer.
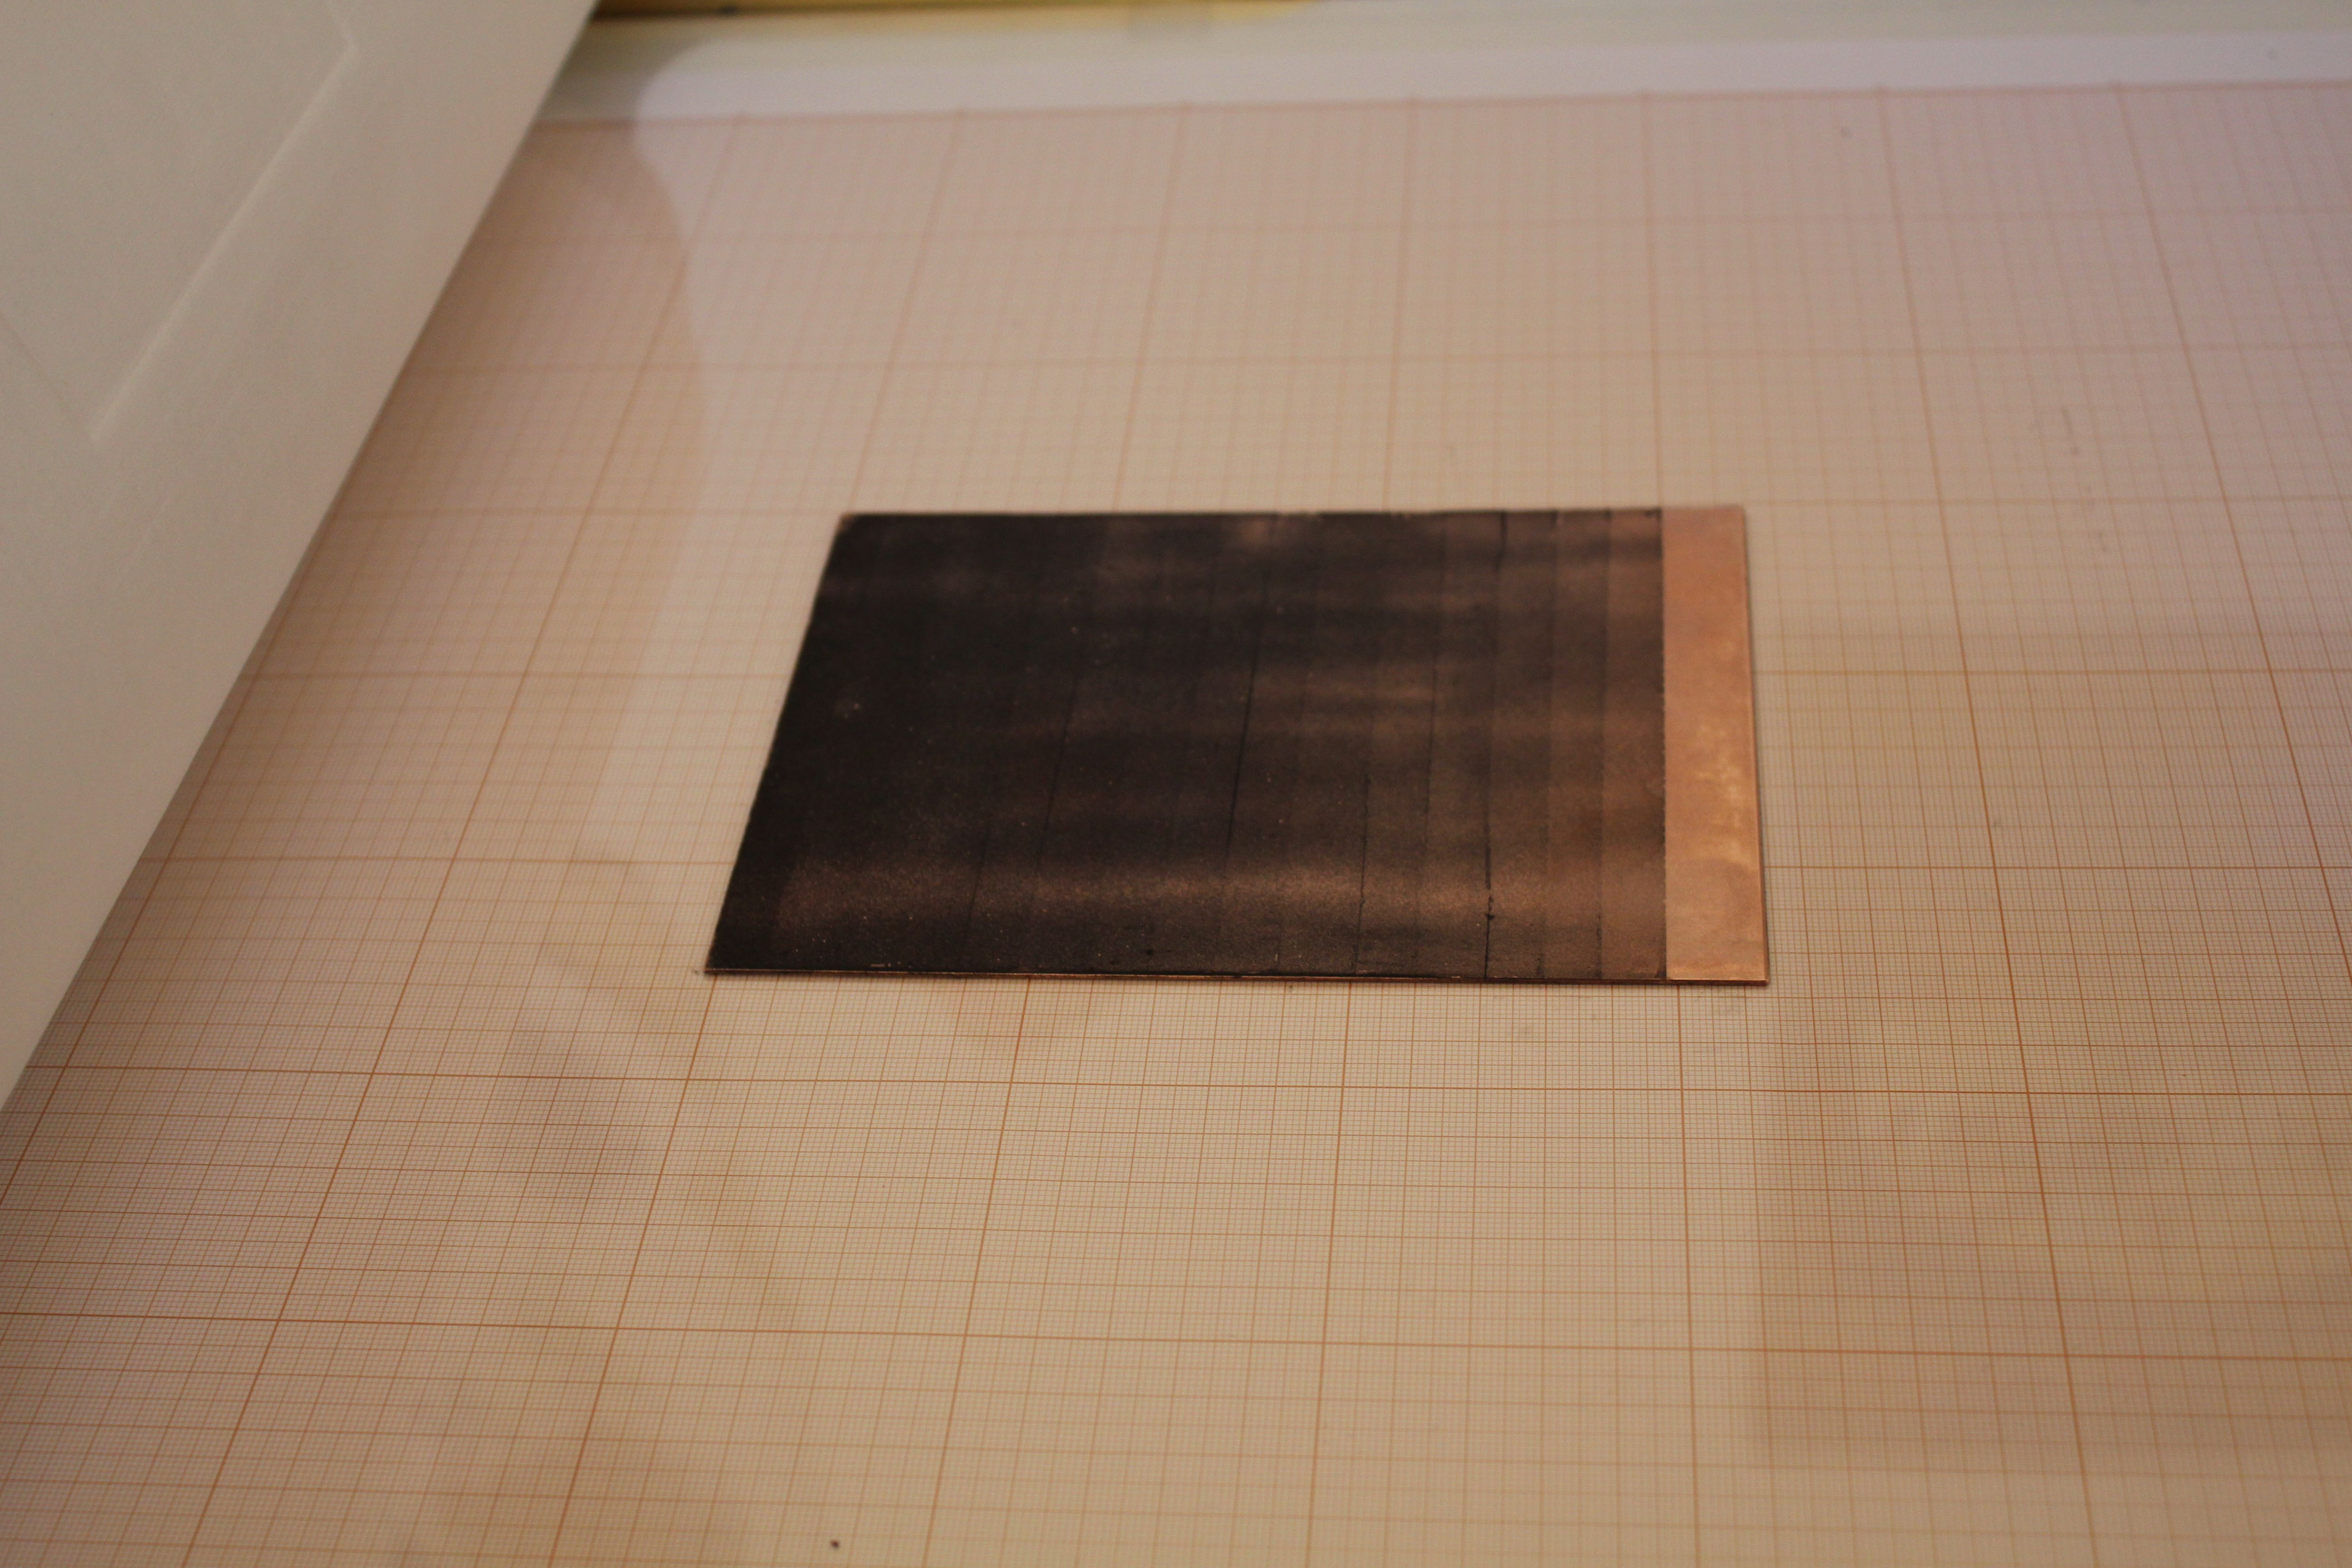
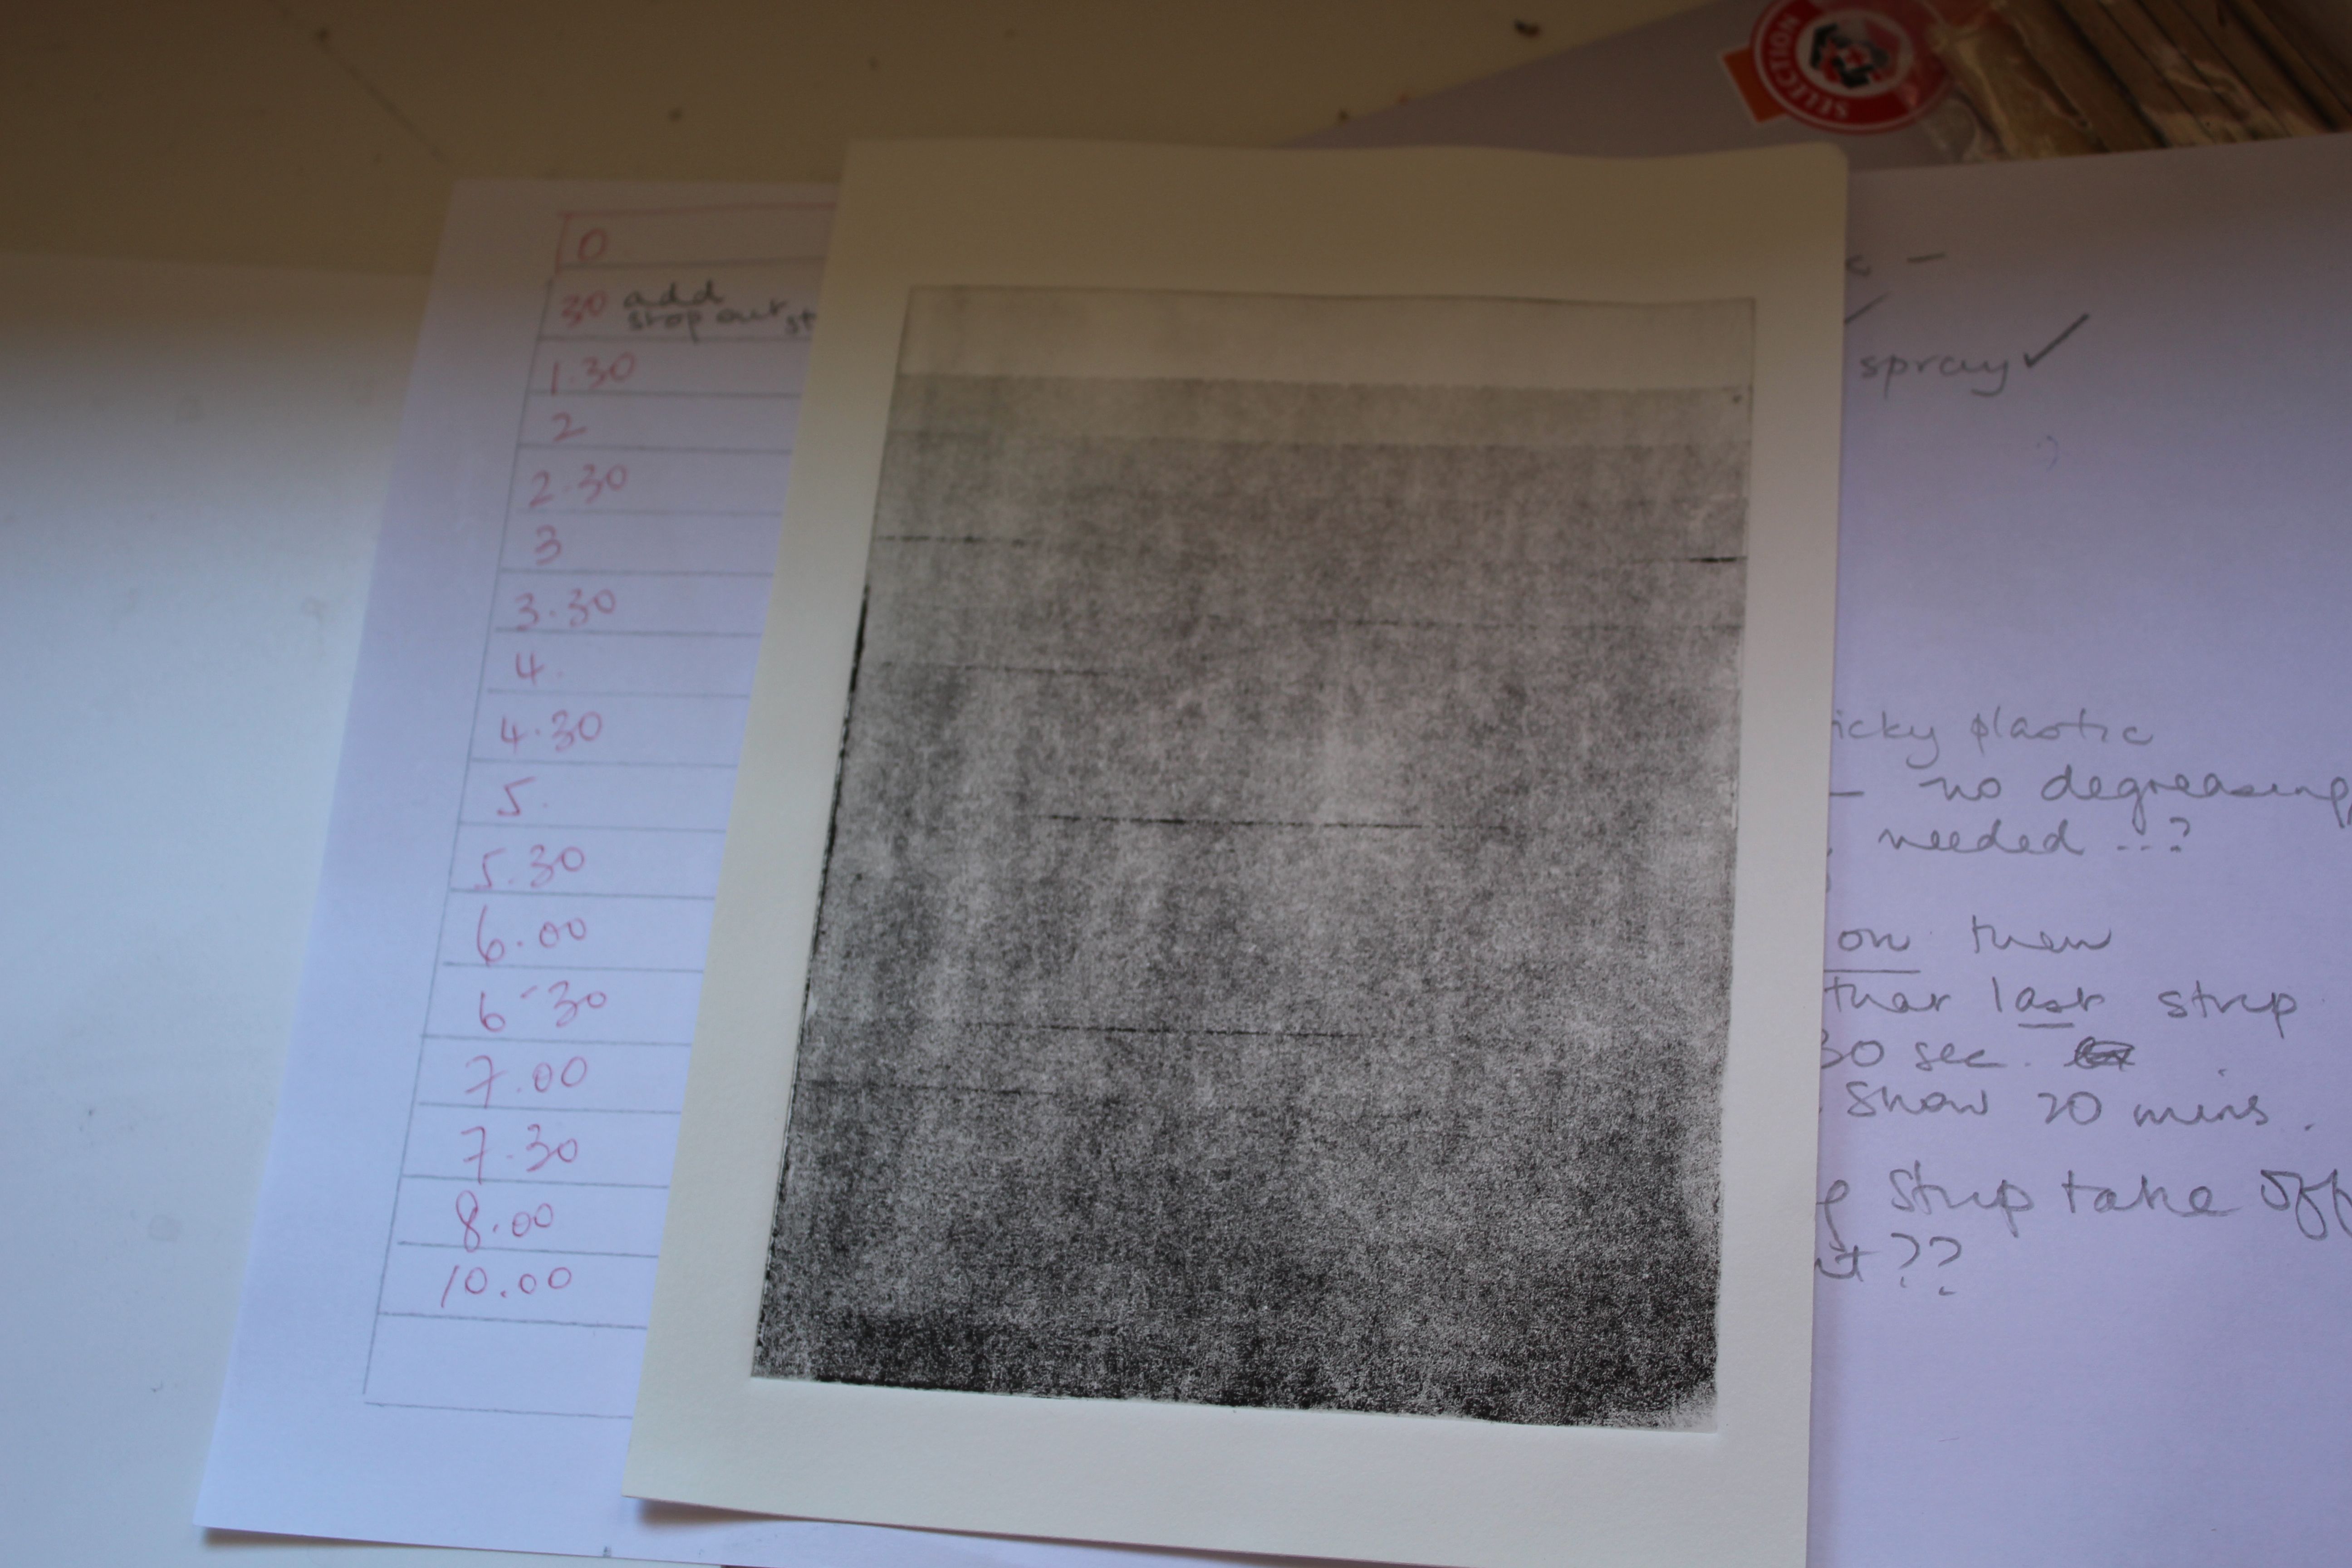
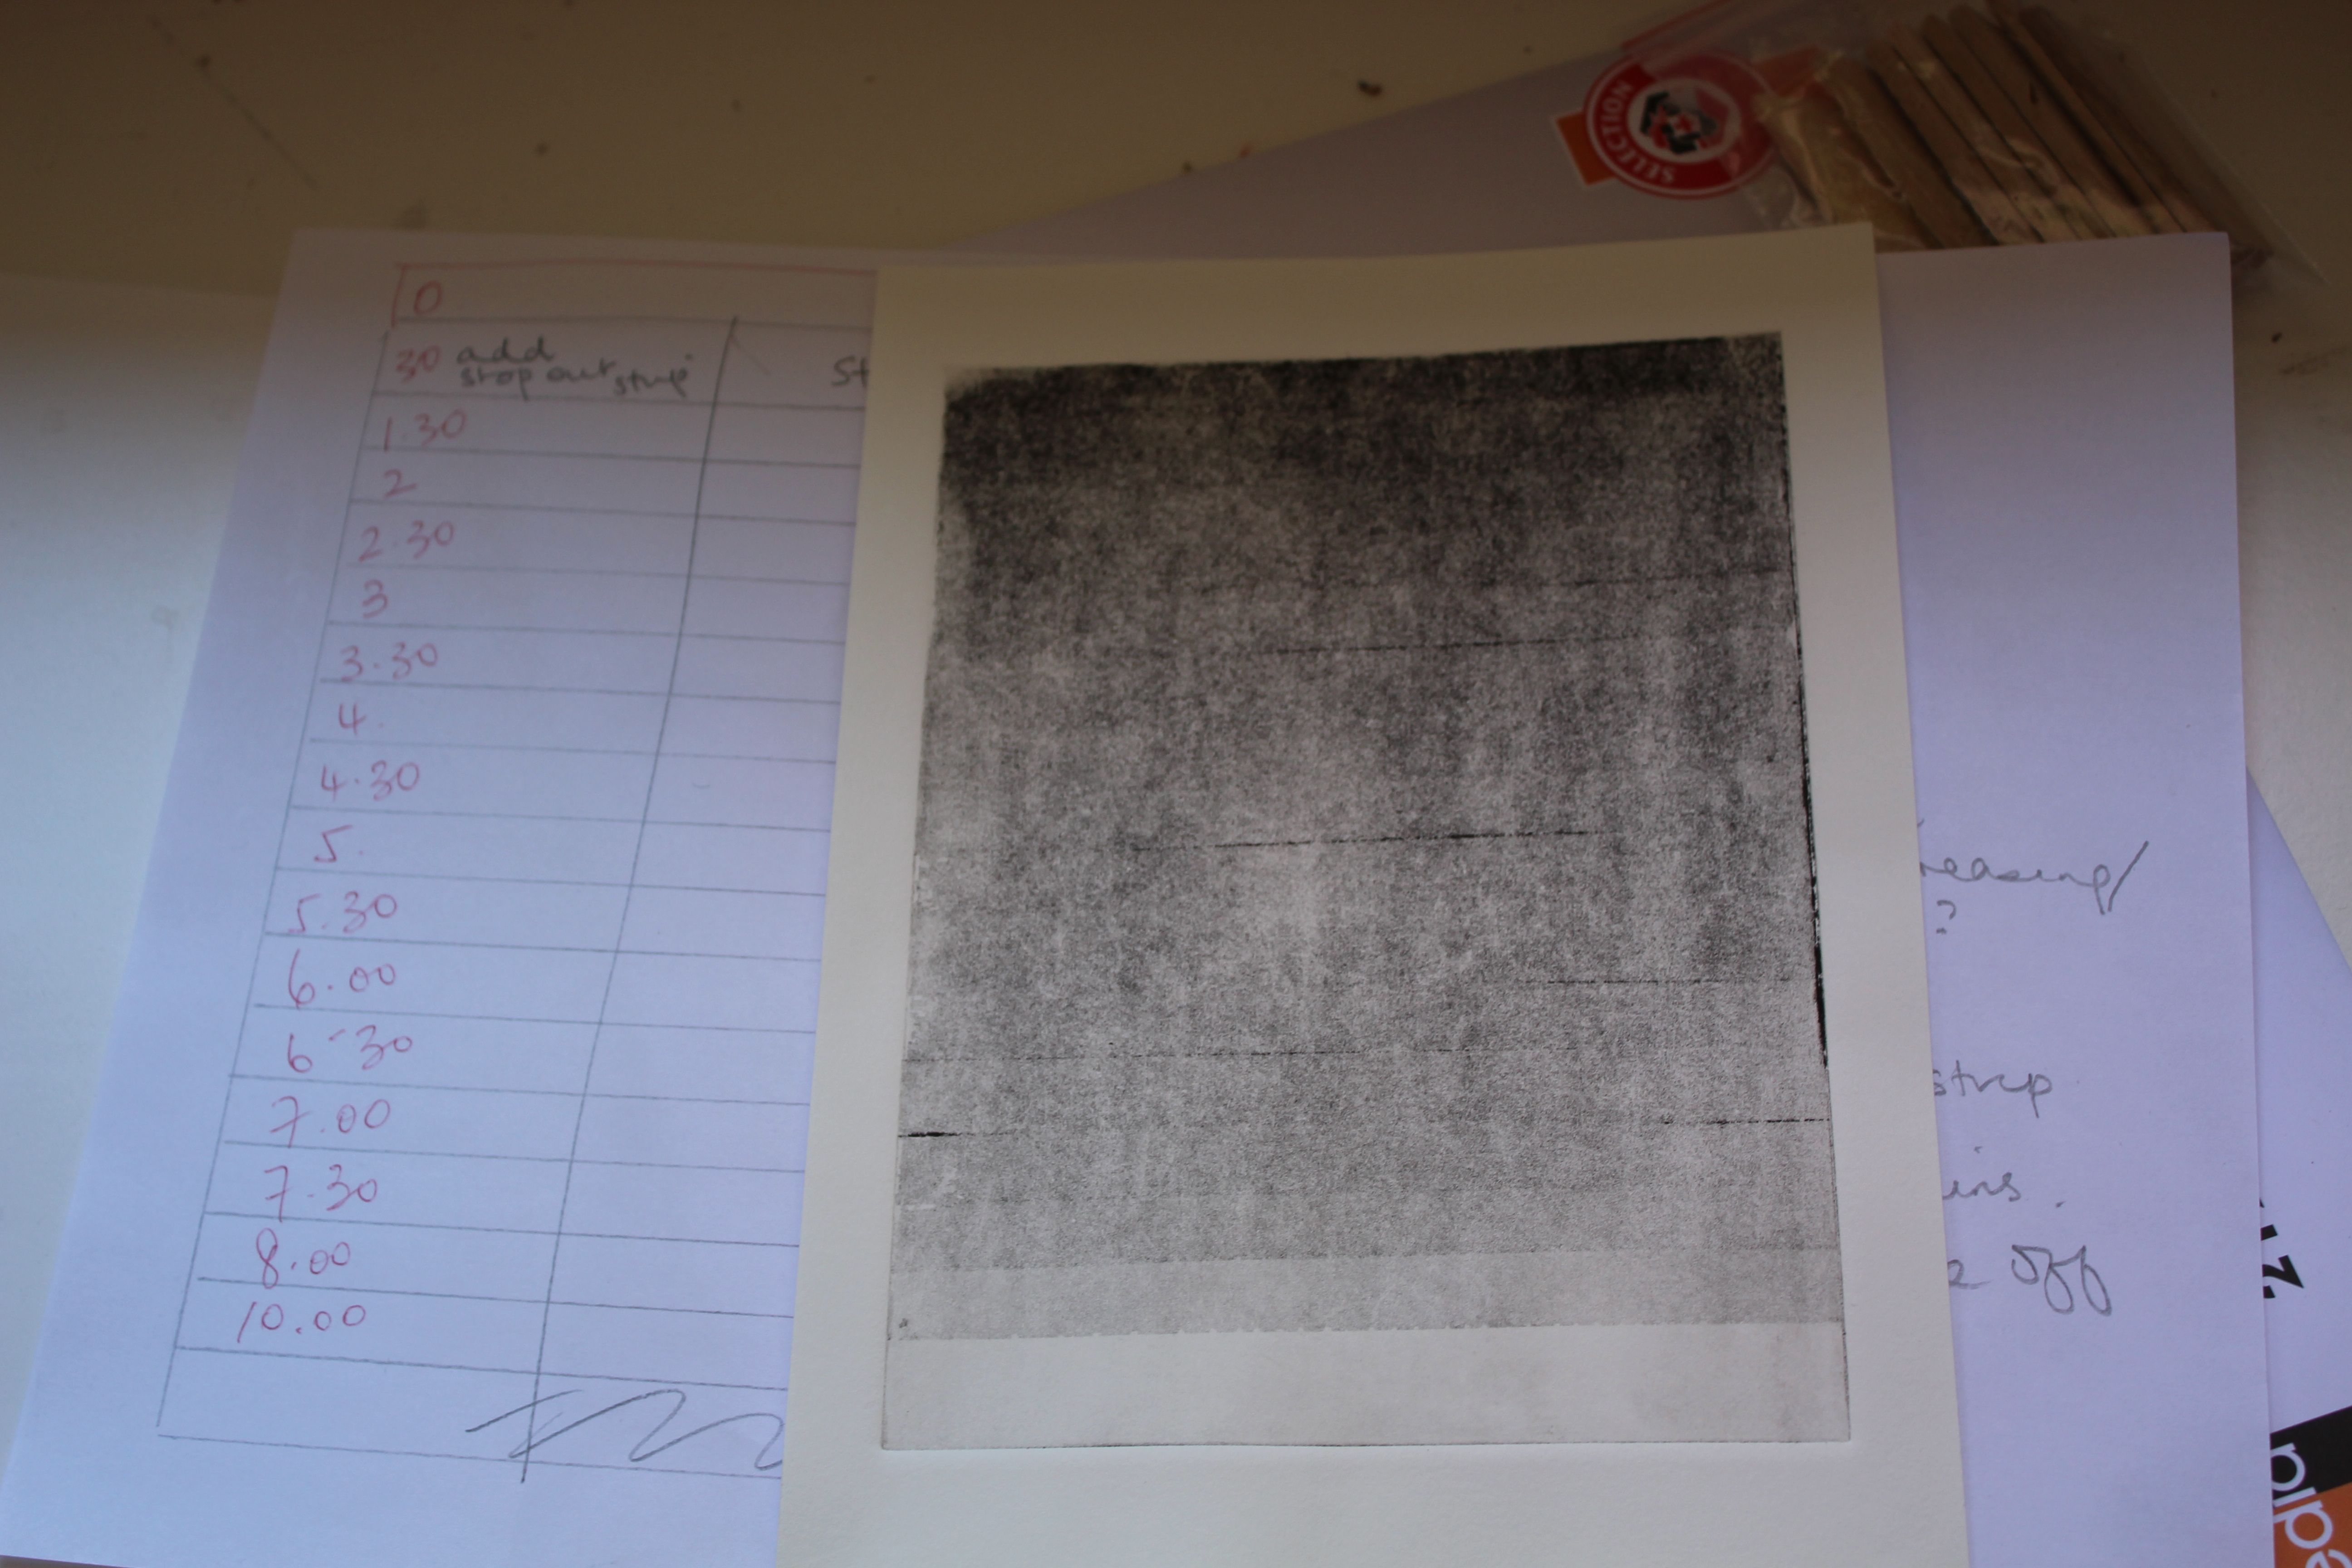
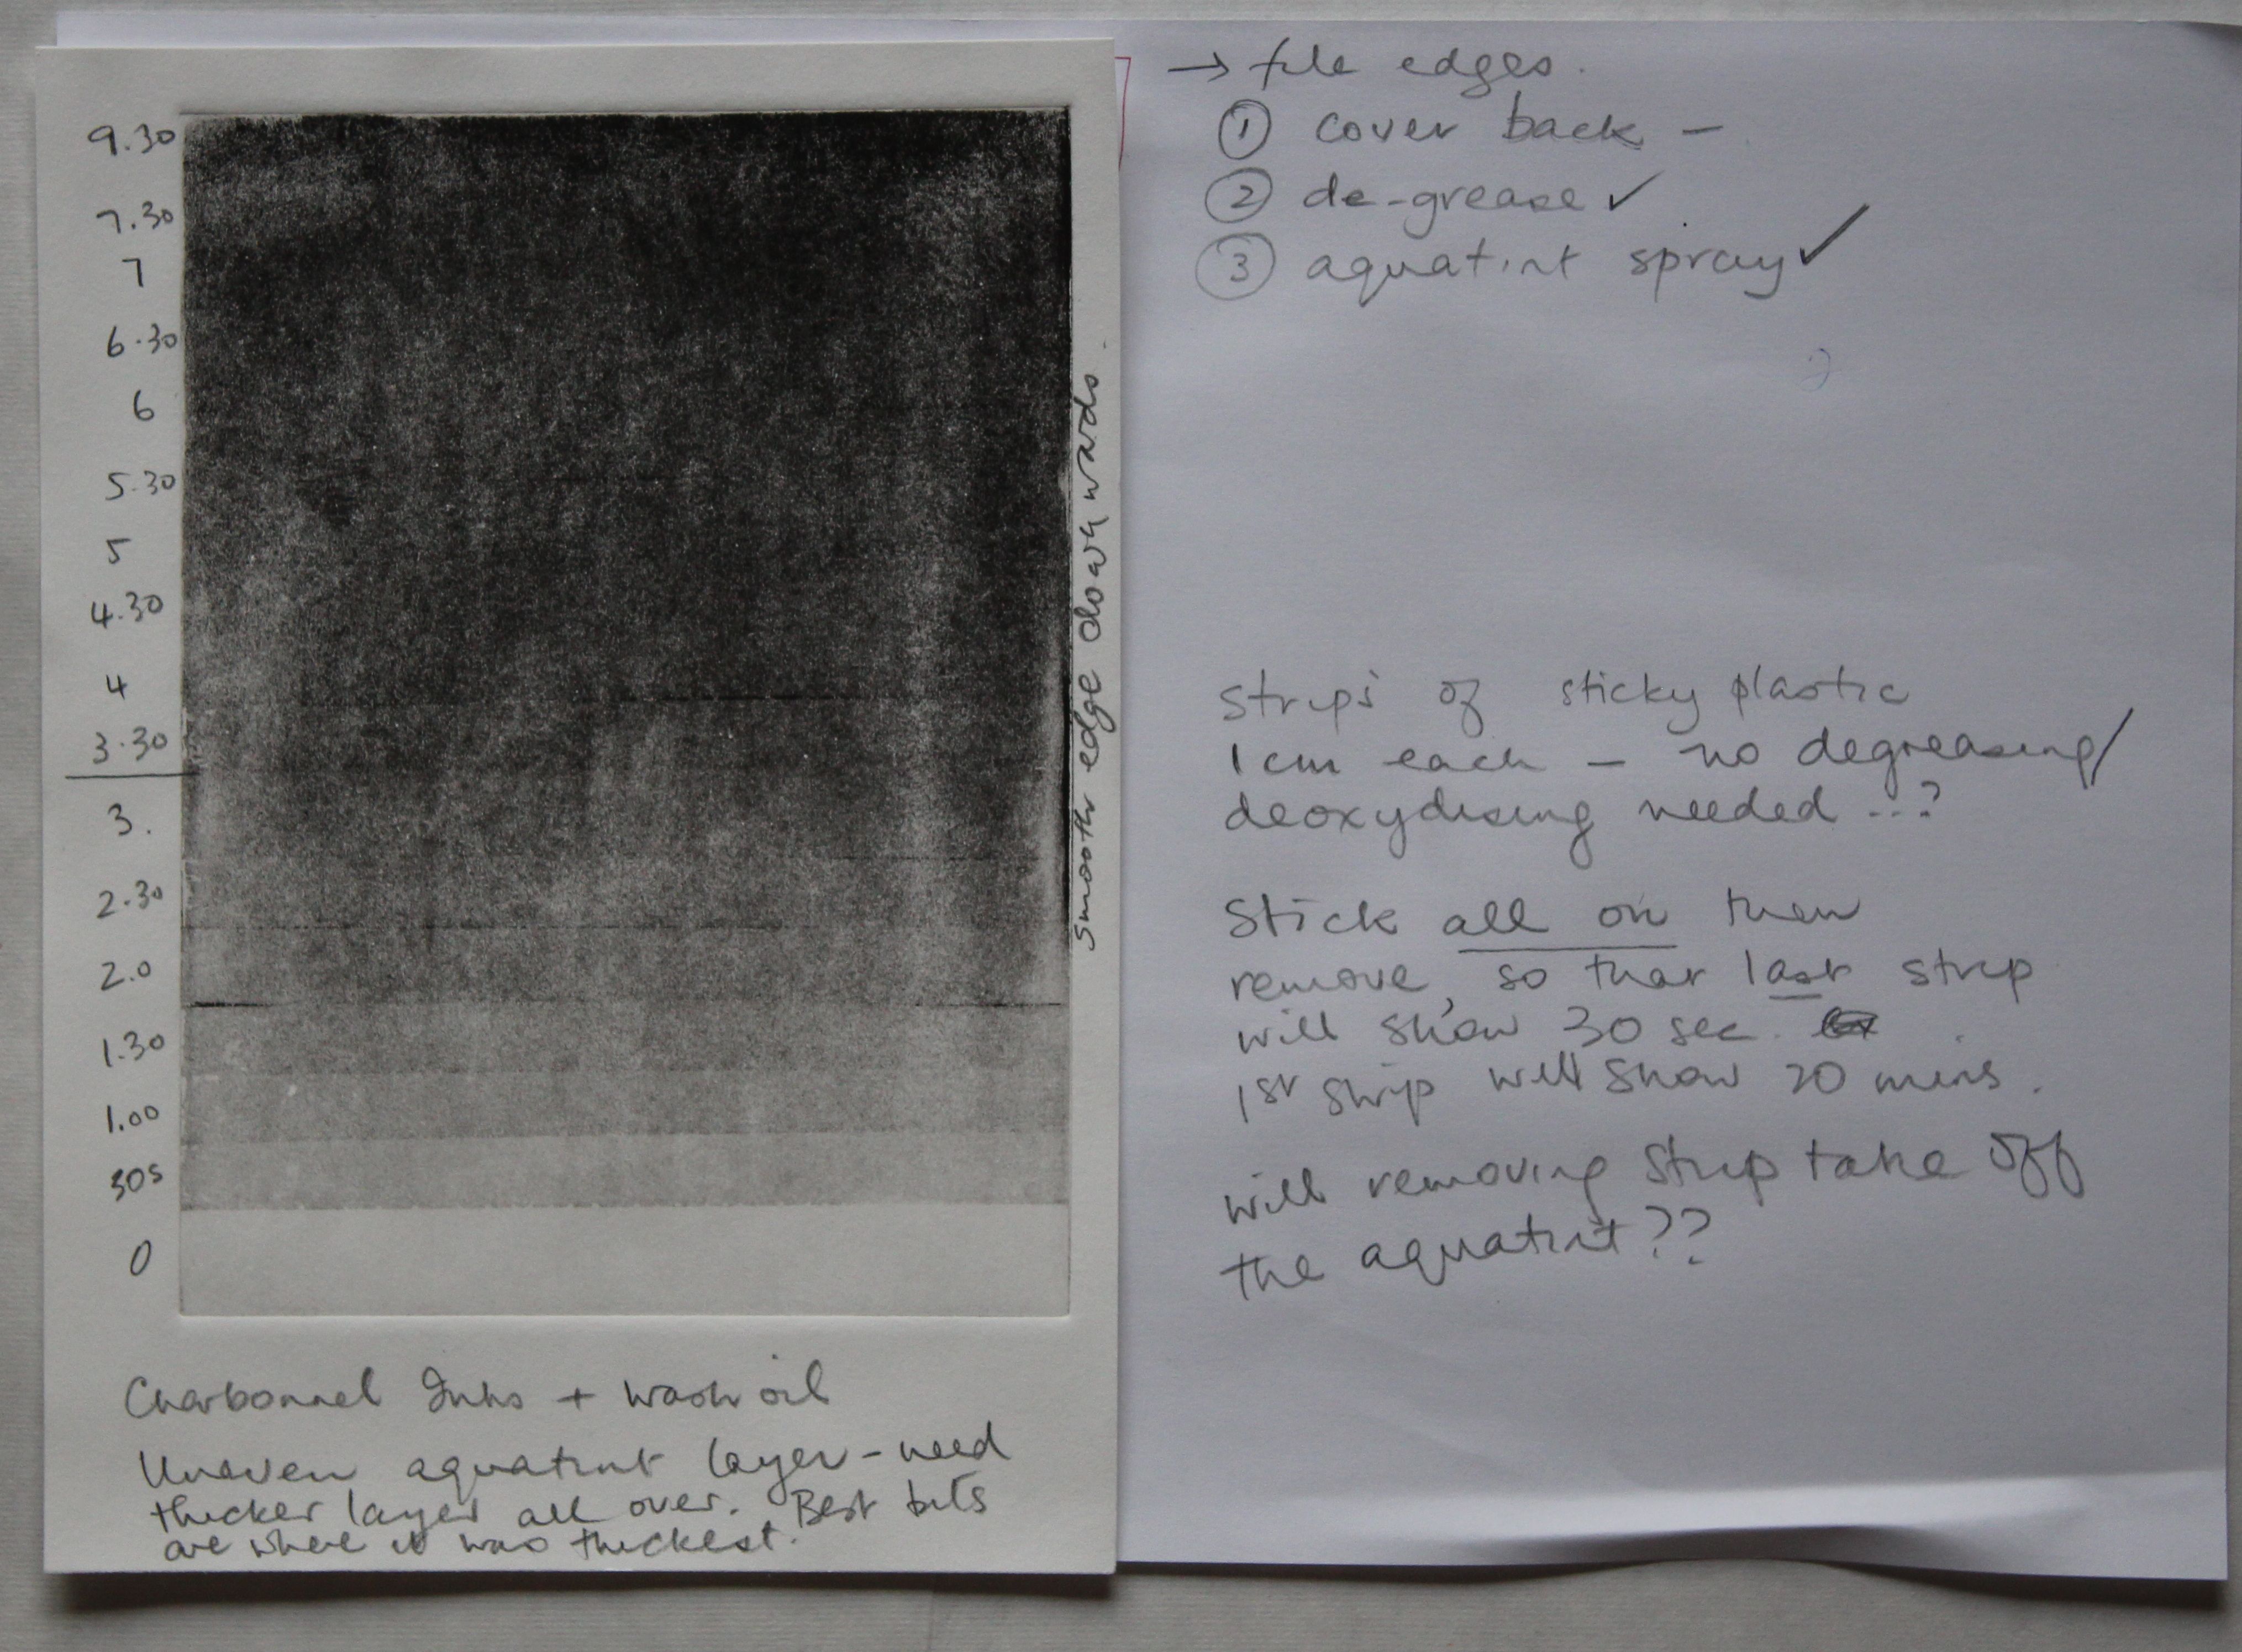
Then I sprayed the plate with an aquatint layer, (acrylic ink with airbrush- also sprayed a dense area) and dipped it for 1 minute in the FC mix. (using vinegar/ salt solution to de-oxidize in between.)
5. Used a litho pencil to mark “1 minute more” and dipped for 2 minutes (3 mins total)
6. Used a couple of different acrylic markers to write “5 minutes” and dipped for 5 minutes (total 8 minutes)
7. Acrylic marker ” 30 minutes” (total 38 minutes)
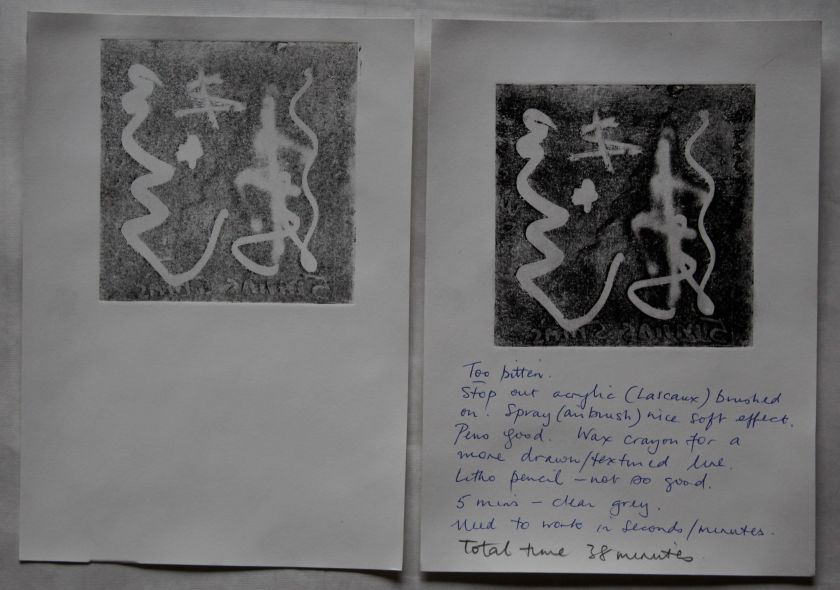
What this taught e was the difference in edges- the acrylic pens are very effective. The airbrush spray is softer. The shades of grey are not very distinct and tend to merge with the aquatint speckled effect in the shorter exposures. Litho pencil – less so- and wax crayon gives a drawn line/ texture. I realise I need to work in shorter intervals but recognise the 5 minute mark as a clear grey.


